Description
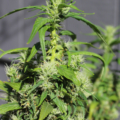
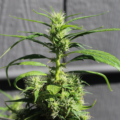
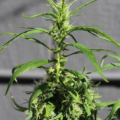
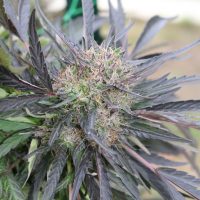
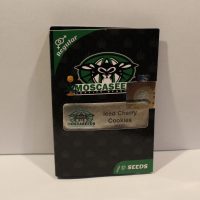
This is an incredible opportunity to buy and own original Santa Marta Colombia Gold seeds! These are from the grow that many of you followed on the forum. They were sourced directly from the natives in Cauca Colombia- the Nasa indigenous. They were able to get them for us because they are able to move more freely throughout Colombia than other Indigenous or other people can. The seeds come from the jungles where guerrillas own the territory. No regular person would’ve gotten anywhere close to this area. That is why it took 6 years and one life to get them out.
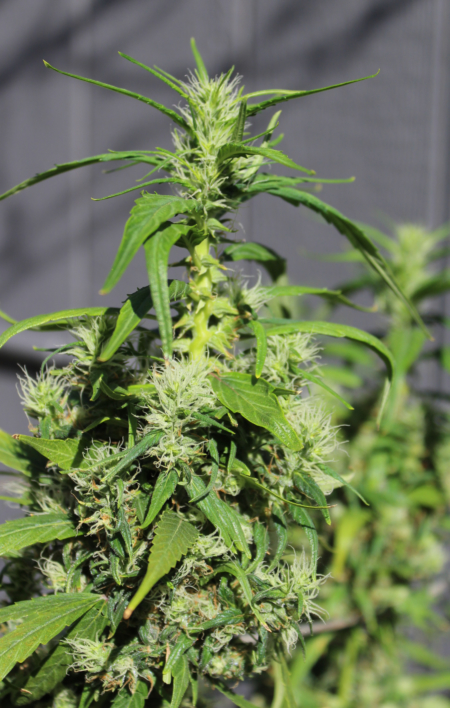
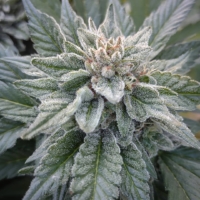
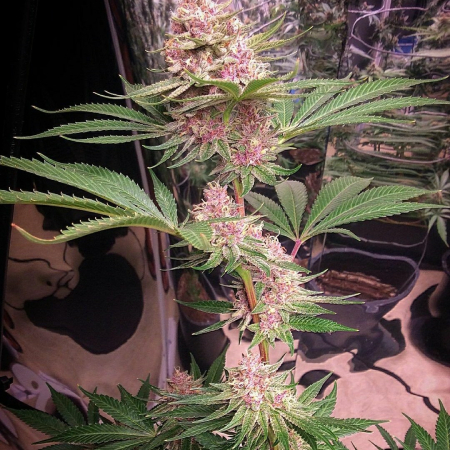
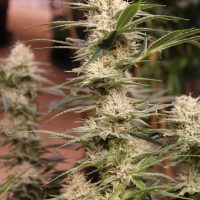
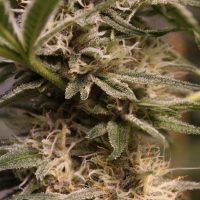
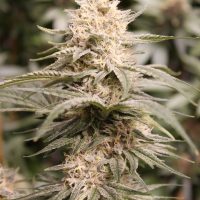
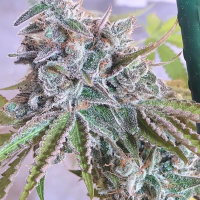
No seed dealers or middlemen involved. These are the real deal, not seen in these parts for generations. Huge, healthy, vigorous plants with huge buds. The spicy pepper and fruity aroma and taste is second to none. This is what it was like back in the day– you will not find anything comparable out there.
Santa Marta Colombia Gold is one of the most famous strains in the world and has been used in so many of our favorite hybrids. About 6 years of work and trouble went into bringing these to you, and you’re guaranteed to be one of just a few who have such a legend in their seed vault. Do not wait, these will be gone fast!
Regular seeds
Sativa- 12-14 weeks flowering
COMPLETE SMCG GROW WRITE-UP:
Part 1–
Over the years I have noticed people looking for old school genetics particularly Colombia Gold . The real strain has been missing from the USA market for many years. Yes, there may be somebody out there who still has some of the original stashed somewhere, but most of us cannot get it or have not seen it other than hybrid crosses for many years. It is guarded by guerillas deep in the Colombia jungle and regular folks cannot go there. The strain is one that is not only very special in it’s own right due to the many strong effects it contains, but also it has been used in many hybrids we see today, especially Skunk strains. Things in the world today are not the best, and this is a strain that must be retained for the future. I decided to take some time a couple of years ago and reached out through various contacts to see what I could find. My search led me to some folks who have been doing just that for the last 6 years. They are the true heroes here, not me. They made contact with the Nasa Indigenous in Cauca Colombia. They are able to move throughout the country much easier than normal people. We were able to get 12 Santa Marta Colombia Gold seeds, and 10 Black Colombian seeds directly from the natives. These are from the jungle, no seed shops or distributors or dispensaries have these. This is a really awesome opportunity and I am going to document both by writing and by photos the entire grow for the Santa Marta. We can use the ” wild grow ” method, or the normal growing method. It is an indoor grow. I will do my best to keep it simple and easy so that you can do this for yourself.
Let’s make sure that we are prepared before we start. These are tropical plants, so you need to keep your growing area warm. At least 78 – 80 degrees or better. Any lower temperatures than that will take away from your plant. You know your room or growing area size, these are large plants, so give them room to grow. Lighting is important and I suggest MH / HPS systems. You can use LED, but then it is important to have enough wattage, and for many another heat source. We start by choosing 7 seeds and germinating them in a paper towel that is soaked from being dunked in two cups of clean water with 1ml hydrogen peroxide mixed in it. Make sure your towel is wet. Set your seeds in the towel and fold it over a couple times and put it in a baggie. Take the baggie and hang it in a warm dark closet for 48hrs. Do not mess with it until then. While your seeds are germinating, you can grab a plastic cup and poke a few holes in the bottom and a 7 gallon pot to start and then grow your plant in. I am going to say two very important things here. Use the best soil you can find to grow your plant in. Use the cleanest water that you can. If you have no choice but to use chlorinated water, let it sit out in the air for a few days before using it or even buy a filter, you will be happy you did. Fill your cup and pot with soil leaving an inch or so from the top of the cup, and two inches from the top of the pot you grow in..
Now after 48 hours we can check the seeds. Those with root tails should be planted in the cup. If not all seeds crack, fold them back up and return them to the closet another day. Some seeds depending on age can take two weeks to crack or germinate. Take seeds that are ready and plant in your cup. Water them keeping them wet and damp, not soaked through out this part of the process. Hopefully the holes in the cup bottom will run off excess water for those of you who over water. We keep the plants in the cup and let them sprout up several inches. You can fill your cup to the top now with soil We will probably leave them here five days to a week under lights 24/7. We do this so that there is only one transplant during the entire grow. Now they are ready to plant in the 7 gallon pot. Make a deep hole in the center of your pot. Pour a half cup or so of water in the hole for the bottom of the roots to get immediate water. Plant your seedling in the hole clear up to the leaves. Water around the plant several inches away from the main stalk, never on the stalk. There will be no more transplanting from here on out. When the seedling grows a couple inches, fill the rest of your pot with soil to the top. To much transplanting causes shock, so the less the better.
The wild grow is different from what you are used to doing, only in doing the entire grow at 12/12 instead of 16/8 and then 12/12. I am sure there are many of you who will be familiar with this process. Once the plants are in the main growing pot, it is time to talk about lighting. These tropical sativa plants need to be kept warm. Very important. Start out with your MH lamp, and you can veg the plants in the blue light for 12hrs per day on and 12hrs off, or you can use the 16 on, 8 off method. This can be done for 2-4 weeks.By doing the 12\12 lighting schedule, you will save two or more days a week on your electric bill making growing this long flowering strain a little more economical. These plants come from the equator area, so they are used to a 12 hour day and a 12 hour night. We are going to pinch the tops of the plants so that they will bush out as they grow and will improve yield. We will top it three times because they get very large and are quite healthy. The last topic before we get growing is feeding the plant. Understand that plants like this from the wild are not used to the nutrients we use today. I will suggest organic or non synthetic food. Do not use flavor enhancer’s either. Use the cleanest food you can get. We will need to feed the plants, and we do not want to burn the plants or leaves by feeding to much or by using the wrong food. We will feed no more than twice a week and starting with half strength to be careful, and strengthen it as we move forward.
Make sure that your soil pH and water pH are at desired levels for cannabis too We planted the seedling in moist wet soil up to the leaves. They are now ready to vegetate in a 12 hours on / 12 hours off cycle. We will use the M/H lamp for the upcoming grow time. We will use this light until we get the plants topped a three times so that our yield is better. We will water the plants daily making sure to keep back from the main stalk. We will feed the plants twice a week. We will start off at half strength so that we do not burn the plants. We can adjust the food as the grow progresses to more or less as needed.
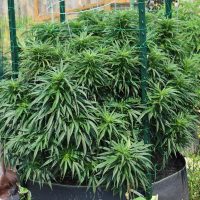
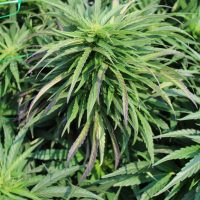
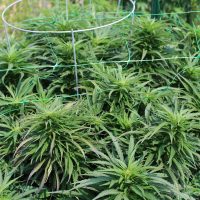
Now that the plants are growing, we have chosen Wednesday and Sunday to be feeding days. We water the plants the other 5 days. These plants grow quickly, so they do require attention daily. If you see yellow leaf tips, or leaves, back off a bit on your nutrients. Truth be told, they are hearty plants and can even take a few mistakes so don’t worry if you feed or water a bit too much. Just back off a bit and they will straighten out quickly. Water and feed for 30 days. Throughput this period topping the plant three times is required so they don’t grow through the roof. This creates 8 main stalks instead of one and will increase your yield. Topping is done by clipping off the third set of leaves each time. So when the first two sets of full leaves on the main stalk are grown, the third set should be clipped. Follow that process two more times and you create eight main stalks instead of one. At the end of thirty days of this routine it is time to flush the plants. Nutrients build up in the plant. At the end of each month of growing it is good to flush them out. You may find that the source you are using for nutrients may provide a flush nutrient. Use it as directed. If they do not have one, then use water for one week and take the nutrients out of their diet for that one week. They will grow better for it. At the end of the 30 day veg period, we can change the lights to HPS. It will now be a few weeks until we can determine sex and prepare to breed. There are photos included for you to see the process to this point. The next posting will be breeding and flowering. The final posting will be flowering and harvest.
There are some fables out there about this strain. Some claim slicing or cutting the stalk or branches cause the Gold color. Don’t ever scar your plants like that. Utter BS. The Gold color comes from the genetics, yes it is a light green strain, but the Gold color comes from drying the plants in the sun. Most cannabis strains will bleach out in the sunlight. They do not have closet’s in the jungle. When the strain is finished, it should have a spicy, peppery, fruity taste. The last real Santa Marta I smoked was probably in 1979. I am very much looking forward to the finished product. Again, there are some repeated items above. I want to keep it simple, but I want certain points to get in your head and stay there. These plants are very healthy and growing them does not need to be a science project. If you want to experiment on them, that is up to you. But this ‘keep it simple’ method will produce some very fine cannabis. I guarantee that. This strain was at the top of the chain years ago. The benefits it produces go from PTSD help to pain relief, and much more. The idea is to get this great cannabis strain back out there again to benefit and help those who need it. Grow it and reproduce seeds and clones and get it out to the masses is the goal of this project.
Part 2
In our last post we stopped at flowering. We ended up with 3 males and 3 females. We have continued the sane regimen of 2 days feeding nutrients and 5 days watering making sure to flush the plants every 30 days. There are two areas of this post that we will hit on. Breeding and lollypopping. When we noticed the male pollen sacs, we then isolated the 3 males. After a week or so we decided on the one we would use to breed. Out of the three, one was smaller and not very vigorous, another was huge with multiple branches, and the one we used fell in between these other two. A good strong well formed plant with structure. I also look at smell and a shiny almost oily look and feel. This one met the standards. It takes a week or so, maybe a bit longer for the pollen sacs to open. I always collect it on the shiny side of aluminum foil. It is easier to see. After collecting, I fold up the foil and store it in a baggie in the refrigerator until I am done collecting. At that point I start breeding. These plants flower in the 10 – 14 week period. Out of the three females, I chose the one that was flowering the best at this point. All three of the female plants even after topping three times are well over 5ft with 8 main stalks now instead of one. Topping is so important indoors. I use a small brush and choose my areas on the plant to breed. After a couple of weeks, I can see the plant has seeds growing. Continue to feed water and flush. The other topic was lollypopping. By removing all of the leaves and branches on the bottom of the three females. We do this because light does not hit the lower branches and the buds do not form well. By removing these leaves and branches it will allow the buds up higher to get the nutrients and grow larger instead of wasting it on the lower growth. I cleaned these off about 12 – 18 inches. You can see this in the photos if you are unfamiliar with with this technique.
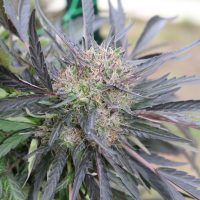
As we head toward harvest, there will be 10 – 14 weeks of flowering. Some will finish quicker. This is why patience is necessary. With the females we grew, we had one done in 10 weeks. You will see in the photos that one of the plants even after topping three times is well over 7ft. It continues to grow. This one is clearly a longer flowering plant. Remember to keep plants clean of dead materials, leaves and branches. Keep feeding until harvest time, and then after 70% – 80% of hairs on buds are red, it is time to do the final flush. . After that final flush, give the plant nothing but water for two weeks. Do not skip this step as it will affect taste. Just do it. When this is complete, put the plant in 48hrs of darkness before cutting down. This activates the cannabinoids in the plant by creating this shock effect. After cutting down, dry and cure. These plants will produce a massive amount of great quality smoke. Treat it right and enjoy the finished product.

